
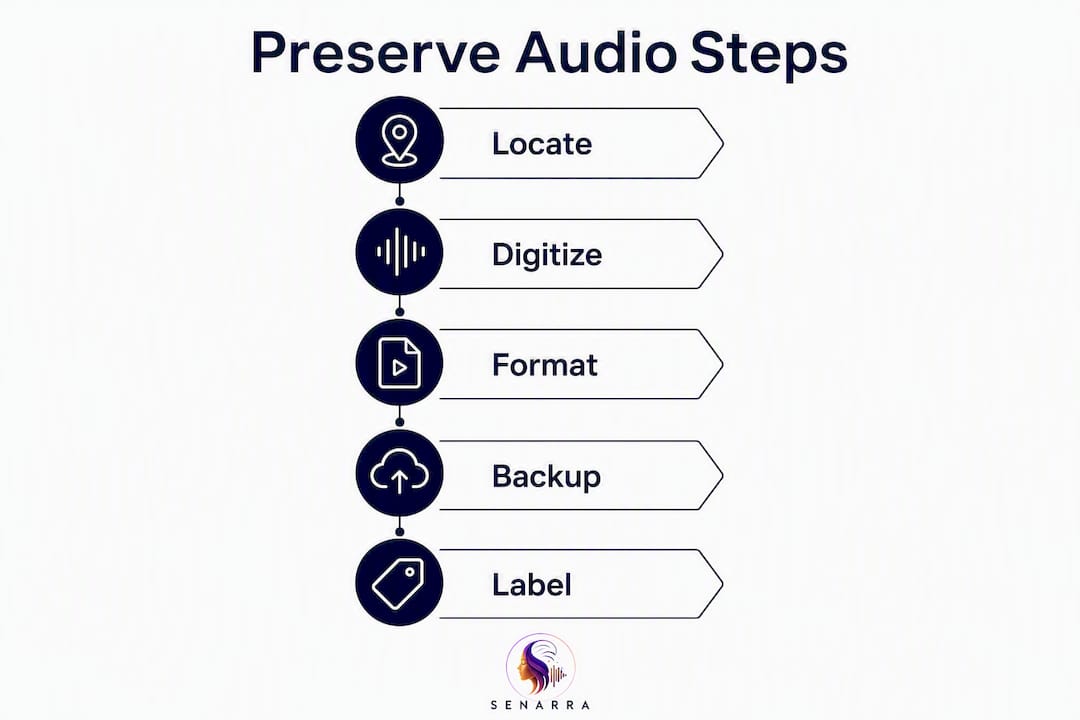
Start by locating the highest-quality recording you can find, making a lossless copy in WAV or FLAC format, and storing three separate backups before you do anything else. That sequence takes under an hour and protects you from the most common failure: losing the only copy while you figure out the rest.
Here is what to do right now:
- Locate the best source (voicemail, video file, voice memo, or physical tape) and identify its format and condition.
- Copy it immediately to your computer without converting or compressing. Rename the copy; never work from the original.
- Label the file with the person's name, date, and a short topic note (e.g.,
2024-06_GrandmaRose_birthday-story). - Back up to at least two additional locations before closing the session (an external drive plus a cloud folder).
- Document consent in a simple text file saved alongside the audio: who recorded it, who consented, when, and how.
Long-term priorities: keep masters in open formats (WAV or FLAC), follow the 3-2-1 backup rule, and check file integrity annually with a full migration every five years. The benefits of preserving audio memories go far beyond nostalgia — a well-kept recording becomes a living piece of family history.
Table of Contents
- Where family recordings are hiding right now
- How to export, save, and digitize audio from each source
- What file formats and backup strategy actually protect audio for decades
- How to name files, add metadata, and make recordings findable for future generations
- Privacy, consent, and basic U.S. legal considerations
- AI voice cloning: what it can do, what it can't, and how to use it responsibly
- Handling weak, damaged, or analog recordings
- How to choose a preservation service that will actually protect your recordings
- Your immediate checklist and a simple preservation timeline
- Key Takeaways
- The part most guides skip
- Senarra keeps the voice, not just the file
- Useful sources and further reading
Where family recordings are hiding right now
Voice audio turns up in more places than most people expect. Before you can preserve anything, you need to find it.
Highest-quality sources first:
- Dedicated voice recorders and digital audio files — standalone recorders, podcast setups, or home studio sessions produce the cleanest audio. Check Downloads and Documents folders on every computer in the household.
- Smartphone voice memos — Apple Voice Memos and Android equivalents store uncompressed or lightly compressed audio. On iOS, open the Voice Memos app and tap the three-dot menu to share or export a file.
- Home video footage — camcorder tapes, DVD-Rs, and phone videos often contain the clearest speech because the person was speaking directly to camera. The audio track can be extracted separately.
- Voicemails — carrier voicemails are often the last surviving recordings of a loved one's voice. Most carriers allow you to call a retrieval number and record the playback; some offer a "Save" option in the visual voicemail interface. For a step-by-step approach, see how phone calls record family stories.
- Cloud backups — iCloud, Google Drive, and Google Photos back up voice memos and videos automatically. Search by the person's name or by date range.
- Messaging apps — WhatsApp, Telegram, and iMessage all store voice notes. In WhatsApp, tap the audio message and use the share icon to export. Quality is compressed (typically Opus or AAC), so treat these as secondary sources.
- Social media and video platforms — Facebook, YouTube, and Instagram may hold videos with clear speech. Download them using the platform's own data-export tool (Facebook's "Download Your Information," YouTube Studio's download button) before the account is closed or the content is removed.
- Answering machines and old digital recorders — standalone answering machines store messages internally; connect them to a computer via a 3.5mm-to-USB cable and record the playback in real time.
- Physical media — cassette tapes, reel-to-reel, and 8-track recordings require separate hardware to play. Treat these as urgent; physical degradation is ongoing.
Pro Tip: Search your email inbox for audio attachments. Relatives sometimes emailed voice memos or short recordings as attachments years ago, and those files are still sitting in sent or received folders.
How to export, save, and digitize audio from each source
The goal at this stage is a single lossless master file for each recording. Everything else, sharing copies, making transcripts, building a family archive, comes after that master exists.
Step-by-step for the most common sources:
- Smartphone voice memos — Open the app, select the recording, tap Share, and choose "Save to Files" (iOS) or a file manager app (Android). This exports the original file without re-encoding it.
- Voicemails with no export option — Play the voicemail on speaker and record it using a second device running a voice memo app, or use a USB audio interface connected to your computer and record in Audacity. Set Audacity to 44.1 kHz / 24-bit before recording.
- Video files (phone, camcorder, DVD) — Open the file in VLC Media Player, go to Media → Convert/Save, select "Audio only," and choose WAV as the output format. This strips the audio track without quality loss.
- WhatsApp and Telegram voice notes — On Android, navigate to
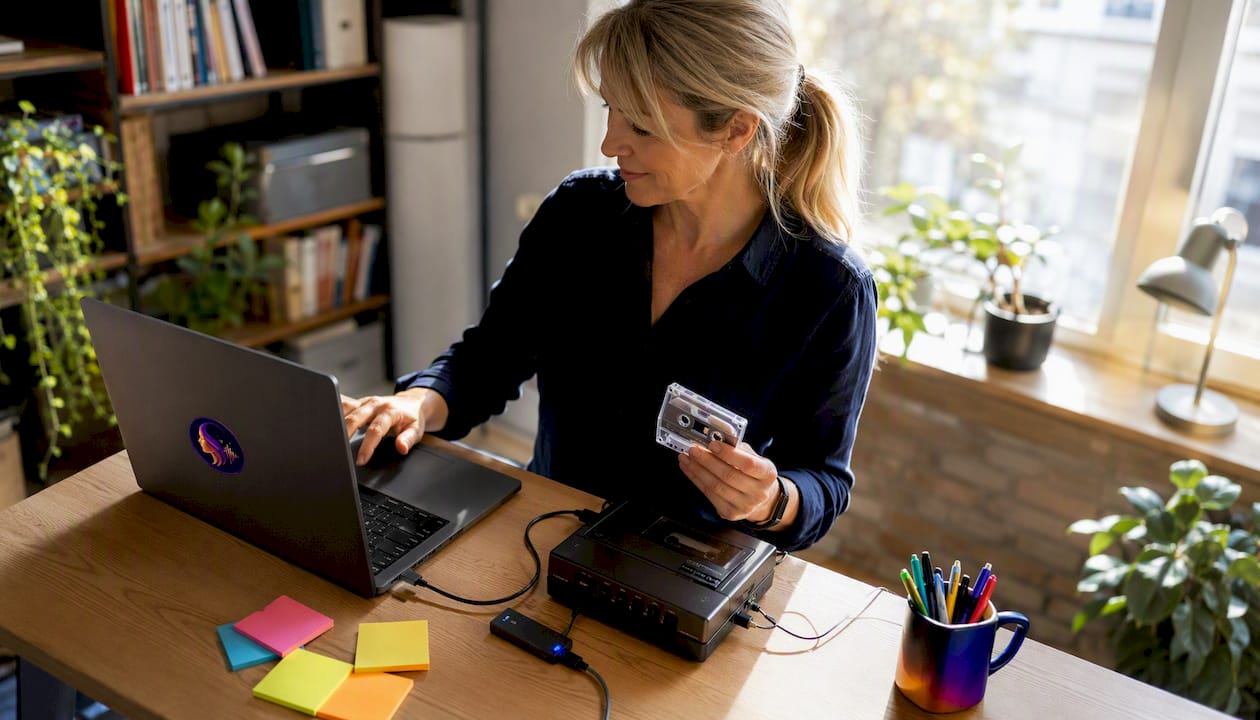
Internal Storage/Android/media/com.whatsapp/WhatsApp/Media/WhatsApp Audio. On iOS, use the share icon inside the app to send the file to your Files app. Rename immediately. - Cassette or reel-to-reel tapes — Connect a tape deck to your computer via a USB audio interface (Focusrite Scarlett Solo is a widely available option). Record playback in Audacity at 44.1 kHz / 24-bit. Do not use the tape's built-in speaker output if you can avoid it; line-out produces a cleaner signal.
- Social media videos — Use the platform's official data-export tool. Avoid third-party download sites; they often re-encode the file and degrade quality.
Lossless master file checklist:
- Sample rate: 44.1 kHz minimum; 48 kHz if the source was recorded at that rate.
- Bit depth: 24-bit for new recordings; accept 16-bit if that is what the source file contains.
- Format: WAV for maximum compatibility; FLAC if storage space is a concern (FLAC compresses without quality loss).
- File size check: a 10-minute WAV at 44.1 kHz / 24-bit runs roughly 150 MB. If your exported file is suspiciously small, the export likely re-encoded to MP3.
Pro Tip: Before you edit or clean up any audio, verify the original file plays correctly and save a separate "do not touch" copy in a clearly labeled folder. Noise reduction and equalization are irreversible; you can always process later, but you cannot undo a bad edit on the only copy.
What file formats and backup strategy actually protect audio for decades
The Library of Congress recommends saving personal audio in open, non-proprietary formats like WAV or FLAC. Proprietary formats (M4A tied to Apple's ecosystem, WMA tied to Windows) carry the risk that the software needed to open them stops being supported.
| Format | Use case | Compression | Long-term risk |
|---|---|---|---|
| WAV | Master archive copy | None (lossless) | Very low — universally supported |
| FLAC | Space-saving archive copy | Lossless | Low — open format |
| MP3 | Sharing, streaming | Lossy | Medium — widely supported but degrades on re-export |
| AAC/M4A | Sharing on Apple devices | Lossy | Medium — platform-dependent |
| Opus | Messaging apps | Lossy | Medium — newer, less universal |
Keep MP3 and AAC copies for sharing only. Never use a lossy format as your master.
The 3-2-1 backup rule is the standard for archival-grade digital stewardship: three copies, on two different media types, with one stored off-site. In practice:
- Copy 1: your primary computer or NAS drive.
- Copy 2: an external hard drive stored at home.
- Copy 3: a cloud service (Google Drive, iDrive, Backblaze, or Amazon Photos) or a drive kept at a relative's house.
Migration and integrity schedule:
- Annually: Open and play each master file. Verify the file size has not changed unexpectedly. Run a checksum (MD5 or SHA-256) using a free tool like HashCheck (Windows) or Terminal on macOS, and compare it to the checksum you recorded when you first saved the file.
- Every five years: Copy all masters to new storage media. Hard drives fail; optical discs degrade. The Library of Congress guidance puts the practical migration window at approximately five years, though some media types warrant refreshing sooner.
A note on checksums: A checksum is a short string of letters and numbers generated from a file's exact contents. If even one bit of data changes due to corruption, the checksum changes. Record the checksum in a plain-text file saved alongside each audio master — it is the only reliable way to know a file is still intact years later.
How to name files, add metadata, and make recordings findable for future generations
A recording with no context is just a sound file. Future family members need to know who is speaking, when it was recorded, and why it matters.

File naming convention — use underscores, no spaces, and lead with the date so files sort chronologically:
YYYY-MM_PersonName_Topic_Location_v1.wav
Example: 1998-07_GrandpaLou_Korea-war-story_Chicago_v1.wav
Essential metadata fields to record (save these in a companion text or spreadsheet file):
- Full name of the person speaking
- Date and location of the recording
- Relationship to the recorder
- Recording device and method
- Source file reference (original filename and where it came from)
- Consent status (who consented, when, and how)
- Brief story note (two to three sentences explaining what the recording is about and why it was kept)
Transcription makes recordings searchable and accessible to family members who are hard of hearing or who speak a different language. Many modern services convert voice recordings into searchable transcripts automatically. Free options include Otter.ai and Google's Live Transcribe; paid services like Rev.com offer higher accuracy for accented or quiet speech. Save the transcript as a plain-text or PDF file alongside the audio master.
Pro Tip: Record a short "liner note" audio clip of yourself explaining the context of the original recording. Future listeners will hear your voice describing who the speaker was and why the moment mattered, which adds a layer of human meaning no metadata field can fully capture.
Privacy, consent, and basic U.S. legal considerations
Recording someone's voice without their knowledge carries real legal risk in the United States, and the rules vary significantly by state.
Consent documentation checklist:
- Name of the person who consented
- What they consented to (recording, storage, sharing, AI voice cloning — each separately)
- Date and time of consent
- Method of consent (written signature, recorded verbal agreement, witnessed conversation)
- Name of the person who obtained consent
- Any limitations the person placed on use (e.g., "family only, not for public sharing")
Privacy best practices:
- Store audio in password-protected folders or encrypted drives.
- Share access only with named family members, not via open links.
- Remove or mute sensitive content (financial details, medical information, third-party conversations) before sharing widely.
- Draft a simple family agreement about what can be done with recordings, especially before any AI processing.
On the legal side, U.S. federal law (the Electronic Communications Privacy Act) permits one-party consent for recording conversations, meaning the person doing the recording can legally record without notifying others. However, California and several other states require all-party consent for private conversations. Recording a phone call with a relative in California without their knowledge could expose you to civil liability even if you are in a one-party state. When in doubt, ask first and document the answer.
"For legal and human-subject approval reasons, audio recording requires consent from all participants for each recording." — Brown University, An Audio-Based Personal Memory Aid
For sensitive situations — estate disputes, medical recordings, or recordings involving minors — consult an attorney before capturing or distributing audio. Documenting consent is not just ethical; it protects the family.
AI voice cloning: what it can do, what it can't, and how to use it responsibly
Voice cloning has moved from science fiction to a consumer feature in a few years, and families are increasingly using it as part of audio memory preservation. The technology deserves honest framing.
How much audio do you actually need?
Some voice-cloning services advertise that a model can be built from as little as 10–30 seconds of clear audio. That is technically true for a rough approximation. For a high-fidelity output that captures pitch, rhythm, accent, and emotional range, 30 or more minutes of high-quality speech are typically needed. Short samples produce a voice that sounds plausible; longer samples produce one that sounds like the person.
Ethical safeguards every family should put in place:
- Obtain explicit, documented consent for cloning specifically — separate from consent to record or store.
- Label any AI-generated audio clearly so listeners know it was synthesized, not a real recording.
- Restrict who can generate new voice-clone outputs (a named list of family members, not an open link).
- Store the original master recordings separately from any cloned outputs; never let a clone replace the source.
- Consider a living-will-style directive that specifies what the person wants done with their voice after death: preserved as-is, available for family listening, or not cloned at all.
The FTC has flagged harmful voice cloning as a growing consumer risk, particularly for fraud and impersonation. Families using cloning for memorial purposes should keep generated audio private and never post it publicly without careful thought about how it could be misused.
The deeper ethical line is the one between preserving a voice and speaking for someone. A clone can reproduce how a person sounded. It cannot reproduce what they would have said. Keeping that distinction clear, and making sure every family member understands it, is the most important safeguard of all. For a fuller look at ethical consent workflows, how AI captures elder narratives is worth reading before you start.
Pro Tip: If you are considering voice cloning, record a clear, explicit consent statement from your loved one while they are able to give it — something like "I consent to having my voice cloned for private family use." That single clip, saved alongside the consent documentation, is the strongest protection you can have.
Handling weak, damaged, or analog recordings
Cassette tapes, reel-to-reel recordings, and old digital files on obsolete formats are the most urgent preservation cases. Converting analog recordings to digital is the only reliable way to guarantee their survival, because the playback equipment is disappearing faster than the tapes themselves.
Risks specific to physical media:
- Cassette and reel-to-reel tapes can develop sticky-shed syndrome, where the magnetic binder breaks down and the tape sheds oxide when played. A tape that squeals, slows, or leaves residue on the playback head is showing these symptoms.
- Attempting playback on consumer equipment can permanently damage a fragile tape. Professional transfer services use a bake-and-transfer workflow: the tape is gently heated to temporarily re-bond the binder, then transferred immediately.
- MiniDisc, DAT, and early digital formats face a different problem: the hardware to play them is scarce and increasingly unreliable.
DIY vs. professional transfer:
- DIY is reasonable for tapes in good physical condition (no squealing, no visible mold, no sticky residue) and for recordings of moderate sentimental value. A USB cassette player (ION Audio makes a widely available model) connected to Audacity works for straightforward transfers.
- Use a professional lab for any tape showing physical damage, any reel-to-reel or DAT recording, or any recording that is the only surviving copy of something irreplaceable. Local audio transfer shops and mail-in services like Legacybox and YesVideo handle fragile media routinely.
On restoration: noise reduction software (iZotope RX is the professional standard; Audacity's built-in noise reduction is a free starting point) can reduce hiss and improve clarity. Use it conservatively. Aggressive processing removes the room ambience, the breath, the slight imperfections that make a voice sound human. A cleaned-up recording that no longer sounds like the person is a preservation failure of a different kind.
Pro Tip: Before sending a tape to a lab, photograph both sides of the cassette or reel, including any handwritten labels. Labels fade and fall off during handling, and that handwritten date or name may be the only metadata you have.
How to choose a preservation service that will actually protect your recordings
Not every app that calls itself a memory-preservation platform is built for long-term stewardship. These are the criteria that separate a reliable service from one that will disappear or lock your files in a proprietary format.
Evaluation criteria:
- Security: end-to-end encryption for stored files and access controls that let you restrict who can listen, download, or share.
- Exportability: you must be able to download your original audio files (not just a compressed preview) in an open format at any time. Test this before committing to a subscription.
- Data ownership: the terms of service should state clearly that you own your recordings and that the company cannot use them for training AI models without your explicit consent.
- Transcription and metadata tools: built-in transcription and the ability to add names, dates, and story notes make recordings findable and meaningful for future generations.
- Family-sharing controls: granular permissions (listen-only vs. download vs. edit) protect recordings from accidental deletion or unauthorized sharing.
- Consent management: the platform should support documenting consent for recording, storage, and any AI features separately.
- Migration guarantees: what happens to your data if the company shuts down or is acquired? Look for a data-export guarantee in the terms.
Pre-subscription checklist:
- Export a test file and verify it opens in VLC or Audacity without re-encoding.
- Read the data-ownership clause in the terms of service.
- Confirm backup redundancy (ask support if it is not documented).
- Check whether AI voice features are opt-in and whether consent records are stored.
| Criterion | What to look for | Red flag |
|---|---|---|
| Exportability | Download original file in WAV/FLAC | Preview-only or MP3-only export |
| Data ownership | "You own your content" in ToS | Broad AI-training license |
| Family access | Per-member permission levels | Single shared password |
| Consent records | Stored alongside audio | No consent documentation feature |
| Migration support | Data-export guarantee | No exit clause |
Senarra is built around these criteria. It captures voice in high quality, supports voice cloning as an explicit opt-in with consent records stored alongside the audio, offers family-sharing controls with per-member permissions, and lets you export your recordings. The memory line feature means family members can access preserved voices by phone, not just through an app, which matters when the people who most want to hear a loved one are not the most tech-comfortable members of the family.
Your immediate checklist and a simple preservation timeline
0–24 hours (do this today):
- Locate the single best-quality recording you have access to right now.
- Copy it to your computer without converting. Do not rename the original.
- Save a backup copy to a cloud folder or external drive.
- Create a companion text file with the person's name, the recording date, and a one-sentence note about what it captures.
- Document consent status (even retroactively: note that the recording was made with the person's knowledge).
1–7 days:
- Search all sources listed in the "where recordings are hiding" section above.
- Export voicemails before the carrier deletes them (most carriers purge saved voicemails after 14–30 days of inactivity).
- Identify any physical media (tapes, discs) and assess condition.
- Set up a 3-2-1 backup structure with at least one off-site copy.
1–3 months:
- Digitize all physical media (DIY or professional, depending on condition).
- Apply a consistent file-naming convention across all recordings.
- Add metadata and short story notes to each file.
- Decide on a preservation service and test its export function before uploading everything.
- Draft a family agreement about sharing, AI use, and access after death.
Ongoing (annual):
- Play each master file and verify it opens correctly.
- Run checksums and compare to your saved records.
- Refresh any storage media approaching five years old.
Estimated cost brackets:
- DIY minimal: near zero if you already own a computer and external drive. A USB audio interface for tape transfer runs $50–$100.
- Mid-range professional transfer: cassette-to-digital transfer services typically charge $10–$25 per tape; reel-to-reel runs higher. Get quotes from at least two local or mail-in services.
- High-end restoration: professional audio restoration for severely damaged recordings can run $100–$300 per hour. Reserve this for recordings of high emotional or historical value where DIY has already failed.
Call a professional when: the tape squeals or sheds during playback, the recording is the only surviving copy of something irreplaceable, or two DIY attempts have produced unusable audio.
Key Takeaways
Preserving a family member's voice audio requires a lossless master in an open format, a 3-2-1 backup structure, documented consent, and a five-year migration schedule to keep recordings accessible for generations.
| Point | Details |
|---|---|
| Use open, lossless formats | Save masters as WAV or FLAC; use MP3 or AAC only for sharing copies. |
| Follow the 3-2-1 backup rule | Keep three copies on two media types, with one stored off-site or in the cloud. |
| Document consent and context | Record who consented, to what, and when — and add a story note to every file. |
| Migrate every five years | Check file integrity annually and copy masters to new media approximately every five years. |
| Senarra for ongoing preservation | Senarra handles voice capture, cloning opt-in with consent records, family-sharing controls, and phone-accessible memory playback. |
The part most guides skip
Most preservation guides treat this as a technical problem. Get the right format, follow the backup rule, done. But the hardest part of preserving a family member's voice is usually the first ten minutes: sitting with a recording of someone you miss and deciding what to do with it.
There is no correct pace for this work. Some families move through it quickly because the task gives them something useful to do with grief. Others need to spread it across weeks, returning to recordings in small doses. Both approaches are legitimate. What matters is that the work gets started before the media degrades or the carrier deletes the voicemail.
If you are doing this alone, consider asking one other family member to help, not necessarily for the technical steps, but for the listening. Having someone else in the room when you first play back a recording of someone you have lost changes the experience in a way that is hard to describe and genuinely helpful.
The recordings you save now will mean something to people who have not been born yet. That is worth a few careful hours.
Senarra keeps the voice, not just the file
Digitizing and backing up a recording protects the audio. Senarra goes further: it gives the recording a place to live, a way to be heard, and a structure that makes it accessible to the whole family, not just whoever manages the hard drive.
Senarra captures voice in high quality, supports guided interview prompts that draw out stories people would never think to tell unprompted, and offers voice cloning as an explicit opt-in with consent records stored alongside the audio. Family members can listen through the app or call the memory line by phone, which means a grandparent who has never used a smartphone can still hear a preserved voice. Recordings are exportable in open formats, so your audio is never locked to the platform.
The 14-day free trial lets you test the full workflow: record or import a voice, add context, share with a family member, and verify you can export your files before you commit. Start your free trial at Senarra and see what it feels like to hear a loved one's voice whenever you need to.
Useful sources and further reading
The sources below back the guidance in this article. Save this list alongside your audio metadata so future family members can verify the archival standards used.
| Source | What it covers |
|---|---|
| Library of Congress — Personal Audio Archiving | File formats, backup strategy, migration schedules, and physical media risks — the primary authority for all archival recommendations in this article. |
| Library of Congress — Audio Tape Degradation (Preservation Blog) | Sticky-shed syndrome, open-reel tape decay, and when professional transfer is required. |
| Brown University — An Audio-Based Personal Memory Aid | Consent requirements for audio recording in research and personal contexts. |
| FTC — Fighting Back Against Harmful Voice Cloning | Consumer risks of voice cloning, fraud vectors, and why keeping cloned audio private matters. |
| NIST — Reducing Risks Posed by Synthetic Content | Technical overview of synthetic audio risks and detection approaches. |
| National Archives — Digital Preservation Guidance | Federal-level guidance on long-term digital stewardship practices. |
| ScienceDirect — Digital Preservation of Sound Recordings | Academic basis for why digitization is the only reliable path for analog audio survival. |
| Alexandra McIntosh Law — Recording Consent in California | State-level recording consent law, with California as a key all-party-consent example. |
Save a copy of this page (print to PDF or bookmark it) alongside your exported audio metadata. The archival standards referenced here are stable, but URLs change; a local copy ensures you can always trace the guidance back to its source.